
NX - How to Export Quality Images in Drafting
Introduction:
• This FAQ explains the steps to generate quality shaded image views in drafting, including the use of translucency.
Requirements:
• Understanding of Modeling and Drafting environments in NX
Step By Step Process…
1. Generate your solid body, or load an existing solid part, and adjust translucency as required.
2. Switch to the Drafting environment and generate a sheet.
3. On the top ribbon select the <File> Tab, then choose Preferences→Drafting*

4. Under the <View > expandable menu select <Workflow>, then scroll down until you see the Visual Settings group in the right-hand pane. In that group check <☑> Use translucency and <☑> Use Line Antialiasing then select <OK>. (n.b. See end of document for anti-alias impacts)
5. Place a view of your choice on the sheet drawing (the default will be a wire-frame view).

6. Select the drafting view boundary, right-click and choose Settings.
7. For best results, in the left-hand pane, under the <Common> expandable menu select <Configuration>, and in the Settings group in the right-hand pane set preference to Exact Representation, rather than Lightweight. You can specify the curve tolerance here also.
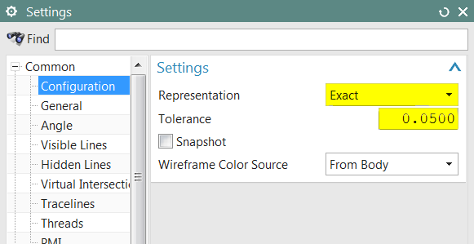
8. Now scroll down further in the left-hand pane and select <Shading>, and in the Format Group in the right-hand pane change the Rendering style from Wireframe, to Fully Shaded. Make any other adjustments needed for surface Shininess, then in the Tolerance group select one of the default Tolerances, or chose Customize to edit manually. Then click <OK>.

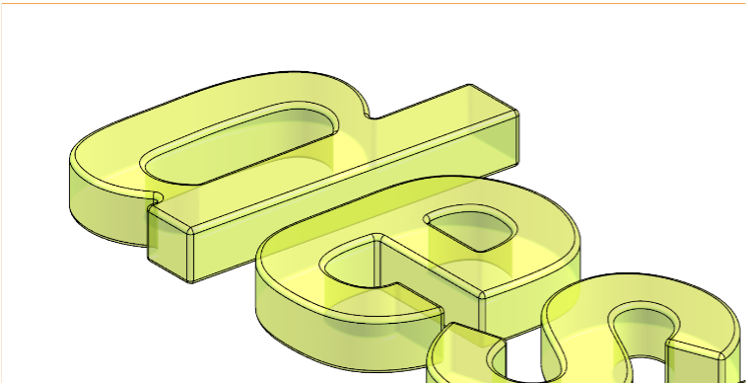
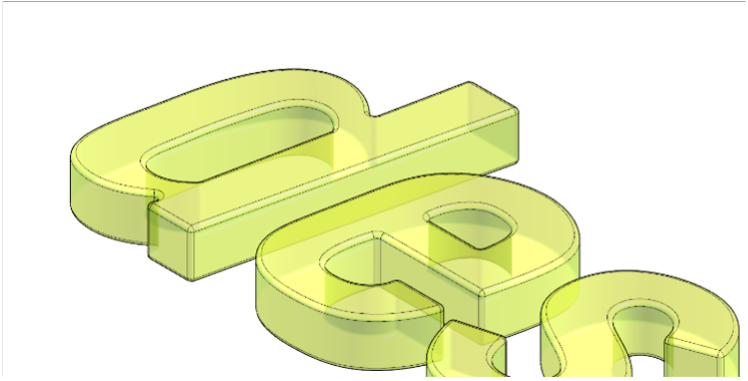
9. You will then see results similar to this:

10. You can then set other view dependent preferences if you want hidden lines, or smooth lines, shown different than the default setting.

11. Once your views are set you can use File→Export→pdf, you can use File→Print to a pdf, (with Export shaded views as wireframe left Unchecked), or you can File→Plot to plot to a suitable configured printer--or even plot out to a graphics format such as TIFF.
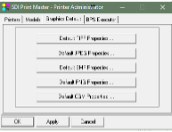
n.b. Out of the Box the Graphic Plotting format resolution is set quite low. If you need a higher resolution you can go into the plotter administration and change the values.
12. To set these Graphic Formats resolutions go to File→Utilities→Printer Administration, you are then prompted to Edit the printer setup or Create a new one. (See the Plotter Setup documentation for this initial setup.) Once you are in the Edit menu, you will see the <Graphics Default> tab, under that tab are the types of graphic formats for plotting to. You can edit each of their default resolutions here.
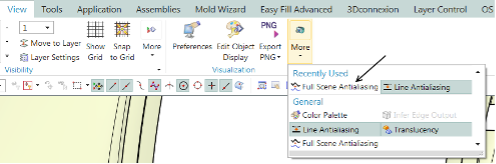
Anti-Alias Notes in Drafting Mode:
Anti-alias choices can make an impact on how well your shaded surface edges show up on the drawings. The two pictures directly below show the Drafting Preference setting “Use Anti-Aliasing”
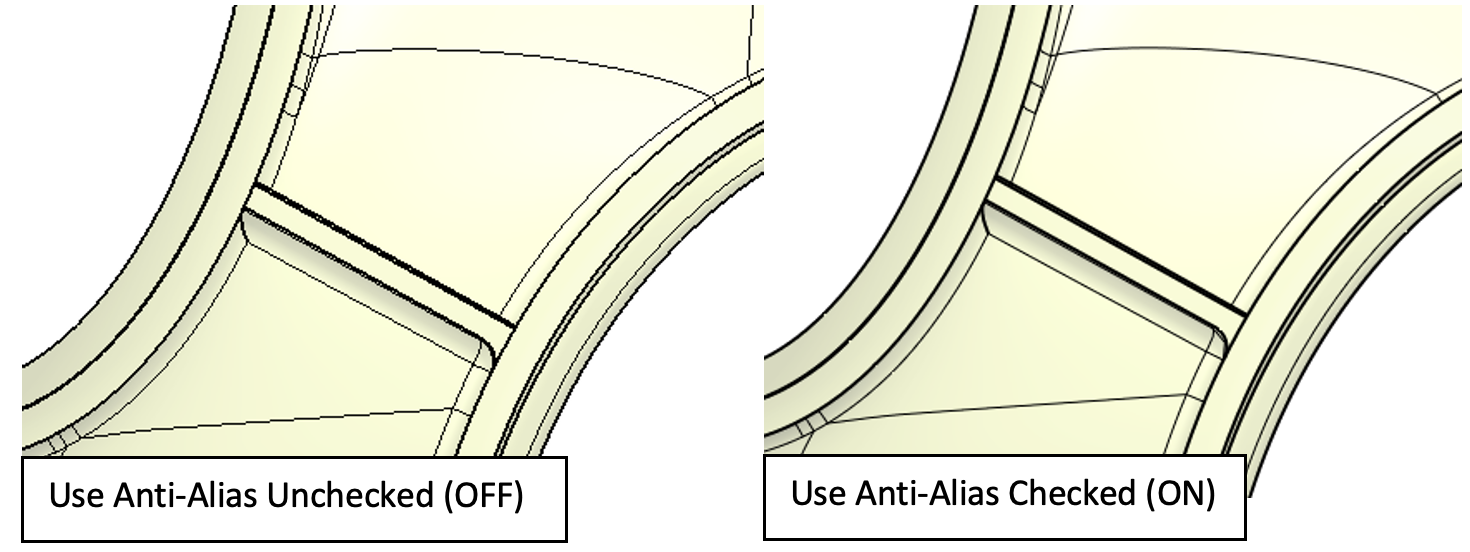
Adjusting Full-Scene Antialiasing toggle, can also sometimes improve results.
October 17, 2024